
Machine Embroidery on Knit Garments
by Laura Pifer, Trash to Couture
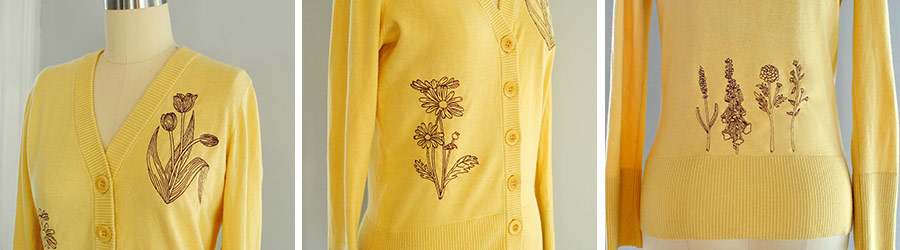
One of my favorite things about machine embroidery is being able to update or customize clothing. You can give basic or old garments a refreshing new look this way. I had this cardigan in the "transform" bin for a while now and was looking for a nice embroidery collection to add to it. When it comes to embroidery on knits I prefer designs that don't have a dense/high stitch count due to the nature of the knit fabric. I typically look for embroidery designs like these floral patterns that have an airy, open design. This Botanical Beauty collection from OESD would be adorable on just about anything from t-shirts to linen towels. They're very quick and one thread color! Get the details below on how to embroider onto knit projects. You can also use this tutorial for t-shirts and other lightweight knit garments.
Supplies
- OESD's Botanical Beauty #12802 embroidery collection
- OESD Polymesh CutAway Stabilizer
- 505 Temporary Spray Adhesive
- Isacord thread
- Fabric marking tool
- Knit garment
Instructions
The first thing you want to keep in mind is the design that I mentioned above. When picking out a design for a knit material you want something that has an open, light design. Dense designs may be too heavy for the knit fabric. This can result in wrinkles, puckering, and a heavy appearance.
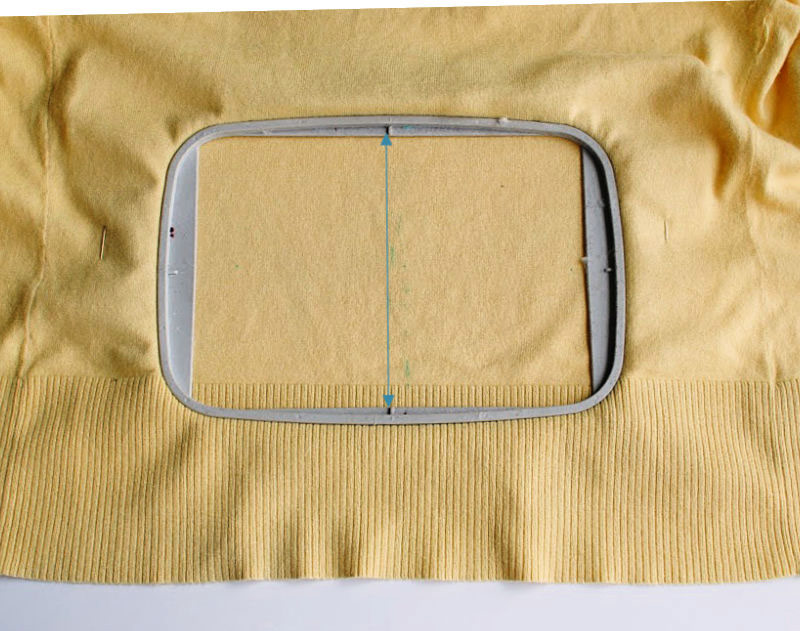
Marking the proper placement is ideal. I like to embroider a sample and or print out a template of the design and use it as a guide. This way you can adjust the size and placement to your desire. I always mark with a fabric marking tool the center of the design with a cross. That way even if my hooping isn't perfectly centered I can adjust with my machine based on my markings.
When picking a stabilizer for knit fabrics I like to use Polymesh Cutaway Stabilizer. This is specifically made for embroidery on stretchy fabrics like knit. It will securely hold embroidery stitches on the garment through repeated washing and wearing. It also has a soft finish to prevent skin irritation. I use this a lot for embroidery on baby and kids' clothing.
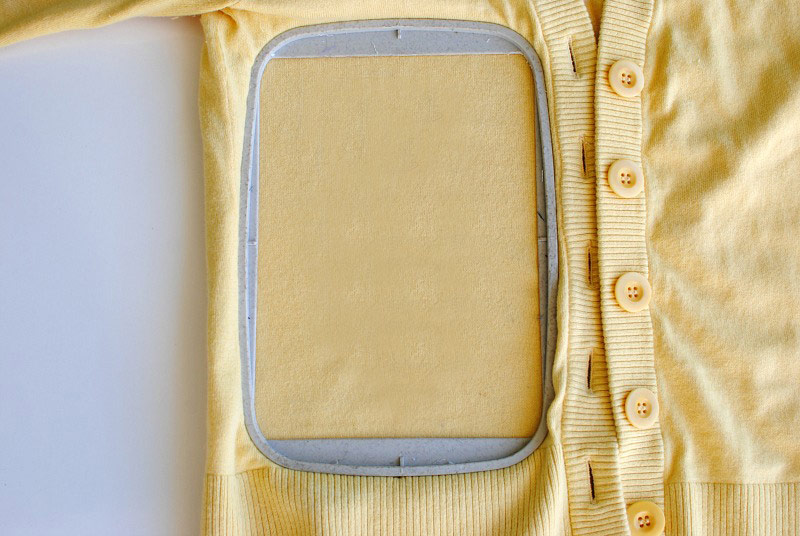
When hooping the knit garment I don't pull or stretch like you would with woven fabrics. I let the fabric lay naturally and hoop it that way (make sure you wash and press it first). If you do pull the knit fabric in the hoop and then embroider, you may notice the garment has puckering/rippling once you remove the hoop. You will want to get the hoop just right to the size of the stabilizer and fabric. What I like to do is hoop the garment and stabilizer and adjust the hoop tension. Then remove the hoop and re-hoop for the final embroidery.
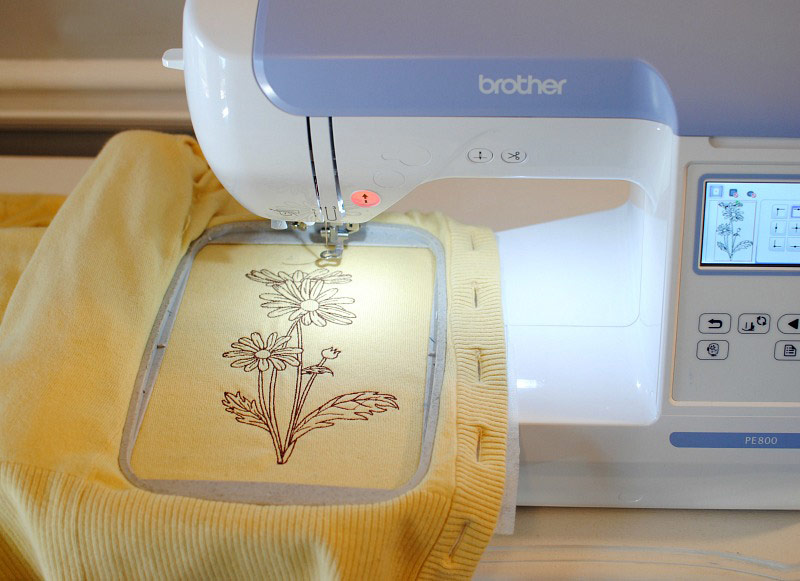
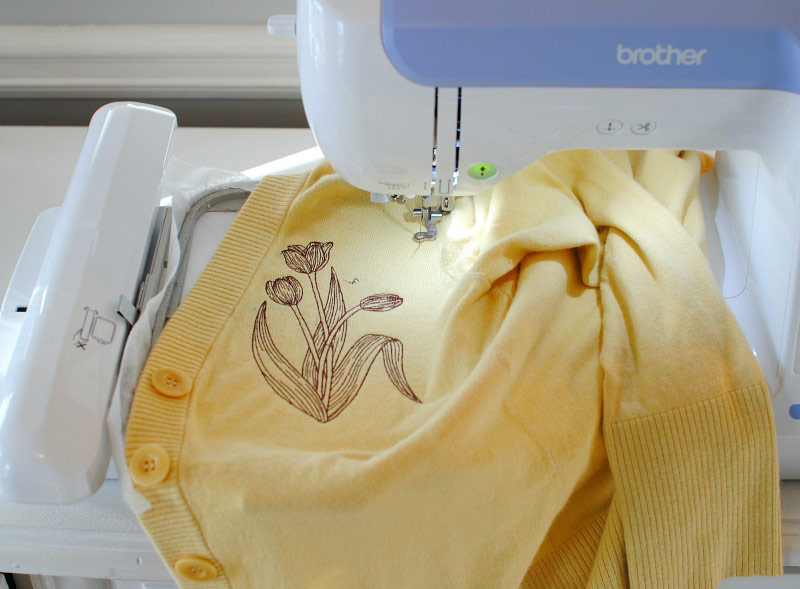
Embroider the first design on the side of the cardigan. See how open the design is...?
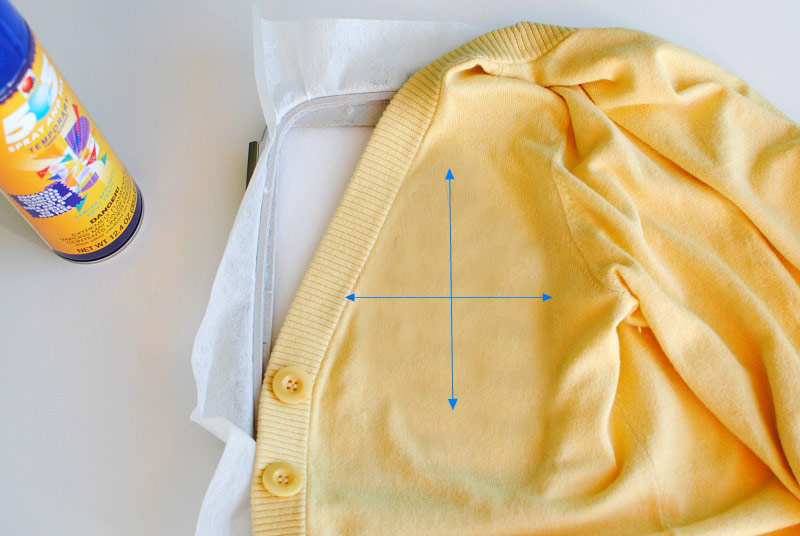
Another way to embroider knit is by floating it. This is ideal for hard-to-embroider places like the front side of the cardigan. It would be hard to hoop the sleeve and the buttons while still getting the design in the proper place. This is an ideal time to "float" the project over the hoop.
Hoop the Polymesh CutAway stabilizer and spray with 505 Temporary Spray Adhesive. This will "marry" the fabric and stabilizer together so they don't slip during embroidery.
Again mark the design placement on the garment and lay flat on top of the hoop.
When floating a project I typically watch over it so nothing bunches up and or gets caught under the hoop/needle.
I also did the back of the cardigan which you'd again use the same techniques above.
This material is © OESD, LLC, and may not be reproduced or published without permission.