How to Embroider on Satin
Embroidering on satin or other slippery, shiny fabrics can be a challenge. The texture of satin can be shifty, and the shiny finish will show any puckers that may remain after embroidery.
In most cases, the best stabilizer choice for satin is two layers of OESD Ultra Clean and Tear. The satin fabric itself has little stability to hold stitches, therefore two layers of stabilizer are recommended.
Because the fabric is shifty, adhering the layers of stabilizer together and to the fabric with temporary spray adhesive will help hold everything firmly during embroidery.
A sharp embroidery needle size 75/11 is the best choice for satin. This will pierce the fibers cleanly without leaving a mark on the fabric. Too large a needle will cause holes in the satin fabric, and using a universal needle can cause puckering, as it will push the fibers instead of piercing them.
Follow these steps to embroider on satin:
-
Press the satin well before beginning. Satin wrinkles easily, and the shininess of the fabric will show every wrinkle. Therefore, it is important to make sure the fabric is very flat and smooth before hooping. Be sure to use the synthetics setting on your iron – too hot an iron will cause the fibers to draw up.

-
Spray the stabilizer layers with the 505 Temporary Spray Adhesive. Make sure you have an even coat over the entire sheet of stabilizer and add the second layer. Then spray this layer evenly with the 505.

- Place the satin fabric onto a flat surface with the wrong side up. Place the sprayed side of your stabilizer onto the wrong side of the fabric and smooth into place.
-
Press the satin again, sealing the layers of stabilizer to the fabric and ensuring a smooth surface for embroidery.

-
Loosen the hoop screw before hooping. Hoop all three layers as one, being careful not to force the hoop into the hoop. Forcing the inner ring into the outer ring can cause hoop burn – a shiny ring area on the fabric that may be difficult to press out. Slide the inner ring into the outer ring gently, and then tighten the screw.

-
If there is any bubbling of the fabric, smooth it out within the hoop. Try not to pull the fabric on the outside of the hoop, but rather to smooth the satin flat within the hoop.

- Place the hoop on the machine and stitch the design using a 75/11 sharp embroidery needle.
- Once the design is complete, tear away the excess stabilizer from the back of the project. The Ultra Clean and Tear will tear away cleanly, and leave a slightly feathered edge along the outside of the embroidery. This feathered edge will leave a smooth transition from the embroidery to the flat satin, preventing a “ridge” at the edge of the embroidery.
-
Press the satin again, this time from the backside. Place the satin embroidery side down onto a towel or the OESD Perfect Embroidery Press Cloth and press. The towel will give a place for the stitches to sink into, allowing you to press the fabric flat.

-
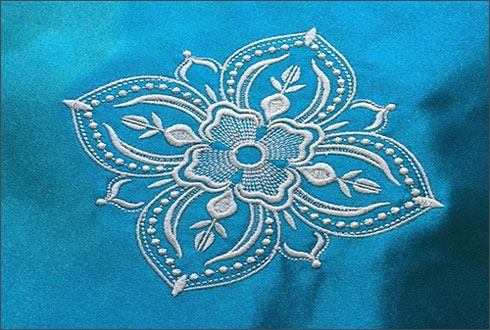
When your embroidery is complete and pressed, there should be no wrinkles or puckers in your satin fabric around your design.

If you follow this process, particularly focusing on pressing properly, using the right needle, and using two layers of OESD Ultra Clean and Tear stabilizer, you’ll find you can get quality embroidery results on your satin fabric every time.
This material is © OESD, LLC, and may not be reproduced or published without permission.