How to Embroider a Cap
Just how do you embroider a cap on a home embroidery machine? This expert tutorial from OESD will show you!
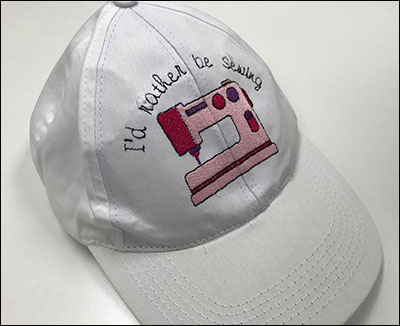
Once people find out you have an embroidery machine, you’ll probably get asked – “Can you stitch something on my hat?” You might want to, but just how do you embroider a cap on a home embroidery machine?
Many commercial and semi-commercial machines have special hoops and drivers that accommodate the round shape of the hat. These systems turn the hat from side to side as the cap is stitched.
If you don’t have a commercial machine with a cap driver, it is still possible to embroider a hat, though a bit more challenging. Instead of hooping the cap itself, you will hoop a stabilizer and then attach the cap to it. Here are the steps to embroidering a hat on a standard home embroidery machine:
Step One: Prepare your design for embroidering on a cap
Because hats have a small stitchable area, you will need to choose a small design or reduce the size of your design to fit the space available.
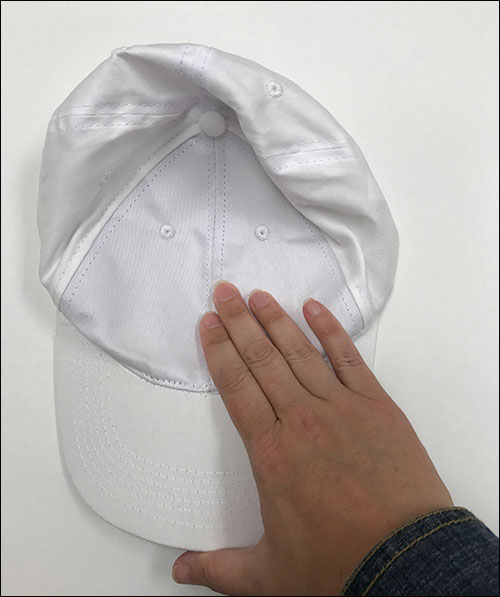
To determine the area you can stitch on your hat, flatten the top front of the hat as much as possible and measure just the area you can press flat against the table.
Flattening or even inverting the brim of the cap if possible will allow you to get more of the top of the cap flat for embroidery. The more structured the hat is, the more difficult it will be to embroider. Choose soft, unstructured caps for the best results.
For our sample hat, the stitchable area is only about 3½” wide by x 2½” tall. However, we can press more of the cap fabric flat toward the top of the cap than we can toward the bill, so if our design is wider at the top than at the bottom, we can get a slightly larger design.
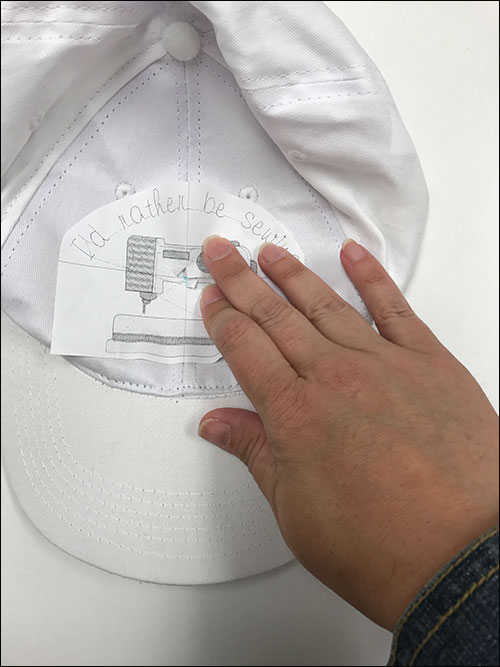
The best solution to maximize your embroidery area is to print a template of your design and audition it on your cap. Most embroidery software programs will print a template of your design with a center mark so you can mark the center of your design on your project.
For our project, we’ve selected the Sewing Machine design #80130-06 from the collection Needle and Thread by Angela Anderson. We’ve reduced it by about 20% and added lettering to the top with our embroidery software. As you can see, the design is larger at the top than at the bottom, but we can press the area to be embroidered flat against the table.
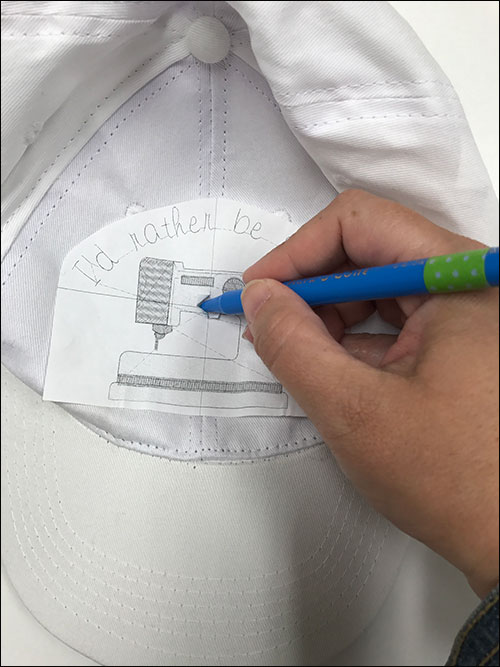
Once you are confident in your design, mark the center of your design on your cap.
Step Two: Prepare the hat for embroidery
Because you will not be hooping the hat itself, the first step to prepare the cap for embroidery will be to hoop the stabilizer. In most cases, it is easiest to work with a slightly larger hoop than needed for the design to give yourself some space to maneuver the hat during embroidery. It is also generally easiest to embroider with the bill facing you at the embroidery machine, as this gives you the most control during the embroidery process.
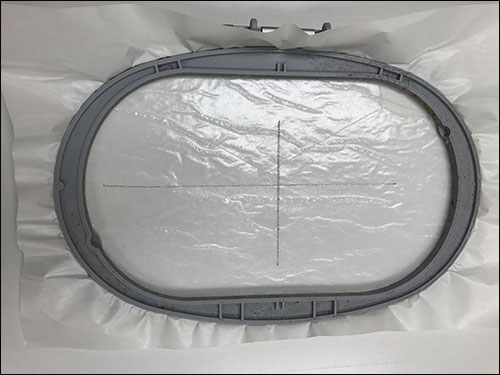
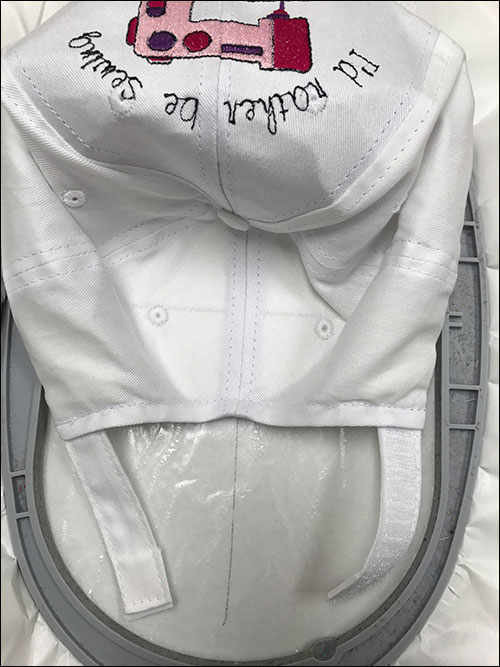
Hoop a piece of OESD StabilStick – This is a peel-and-stick stabilizer. Hoop the stabilizer by itself with the paper backing side up, and then score the paper backing. Next tear away the paper backing, revealing the sticky stabilizer underneath. Mark the center of the hoop.
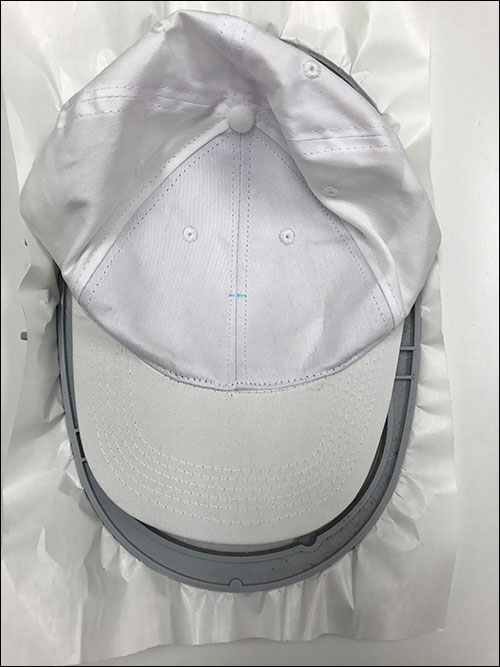
You will be able to then attach your cap by pressing the area to be embroidered onto the stabilizer, aligning the marked center on your cap with the marked center on the stabilizer. When your embroidery is complete, you can remove the excess stabilizer simply by tearing it away.
Step Three: Embroider the cap
Most hats will require a larger than standard needle for embroidery. This is due to both the thicker fabric and/or lining, as well as the fact that you will often be stitching through a seam. A size 90/14 is a good choice for most caps.
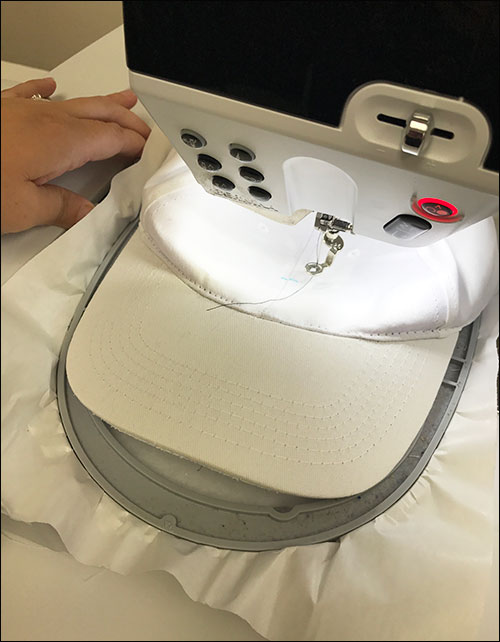
Select the design and place the hoop on the machine, working carefully to be sure you do not dislodge the hat from the stabilizer in the process.
IMPORTANT: Turn off ALL thread cutters while embroidering a cap. Thread cutters often cause the hoop to move, and this movement could hit the bill of your cap and dislodge the project.
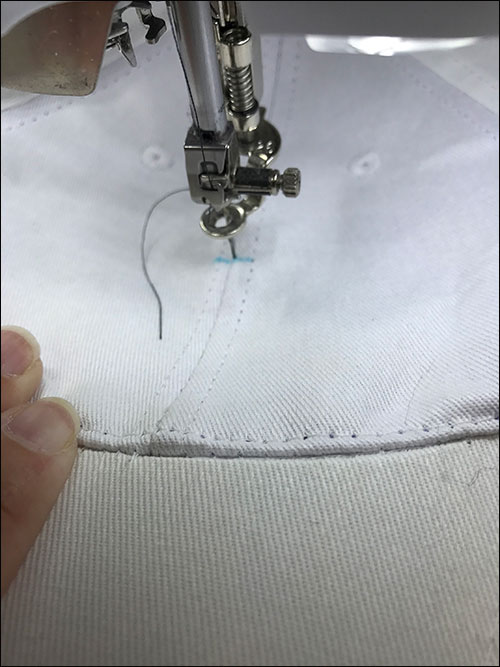
Adjust the design position if needed to center the design over your center mark on your cap.
Do not use the basting function of your embroidery machine with a cap. The basting area forms a box around the design, and that box may extend past the embroiderable area of the cap even though the design fits within that area.
Once you are confident in the placement of your design, begin your embroidery. You may need to thread your needle manually, as the excess cap can get in the way of your needle threading mechanism.
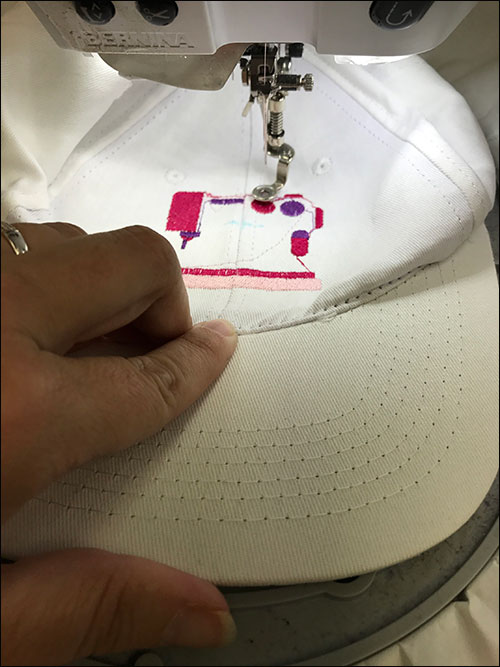
If possible, reduce the embroidery speed of your machine as you stitch. You will need to watch that the hat fabric stays flat during embroidery and that no part of the brim or the rest of the hat folds into the embroidery area.
You may need to hold parts of the hat out of the way during embroidery, so be extremely careful not to get your fingers caught under the needle or needle bar.
Once your design is complete you can simply remove it from the hoop and remove the stabilizer from the back of the cap!
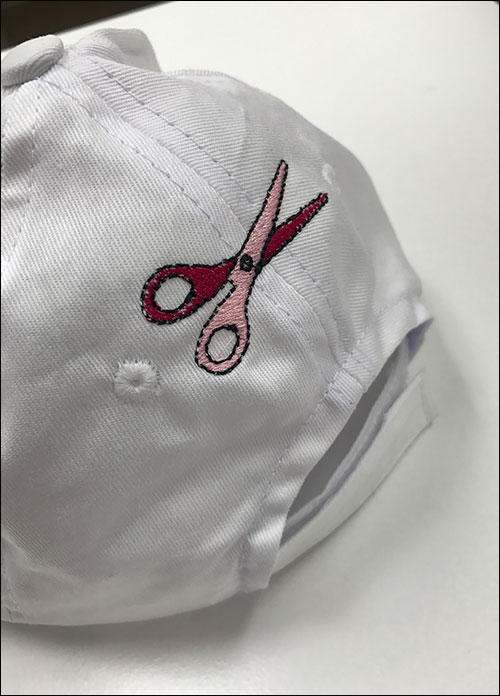
If you are looking for a less challenging way to try your hand at embroidering a cap, try embroidering the back or sides – the process is essentially the same, but without the bill of the cap in the way, you’ll find it easier to do.
This material is © OESD, LLC, and may not be reproduced or published without permission.
